Showing posts with label android. Show all posts
Showing posts with label android. Show all posts
Monday, February 2, 2015
Fifa World Cup 2014 with Android Live Wallpaper
ADIDAS FIFA WORLD CUP 2014
Live Wallpaper and Clock Widget App
Enjoy the spirit of Fifa World Cup 2014 with Android Live Wallpaper

Adidas Fifa World Cup 2014 is most amazing and very popular Live wallpaper available for Android Devices during world cup 2014 season. Enjoy the "Brazuca" the official ball for world cup 2014 on your screen. Select a pitch of your choice and your country flag. Support your football teams by selecting flag theme for stadium . The app will connect you with the action of football world cup . Whenever you will unlock your device you will redirect to stadium atmosphere . Show your national pride display your country flag in center circle of stadium with five kind of different Brazuca ball or choose other balls as your choice. Shoot your ball whenever you want and bring it back by using device accelerometer or wait for to reset.
Screen Shots :
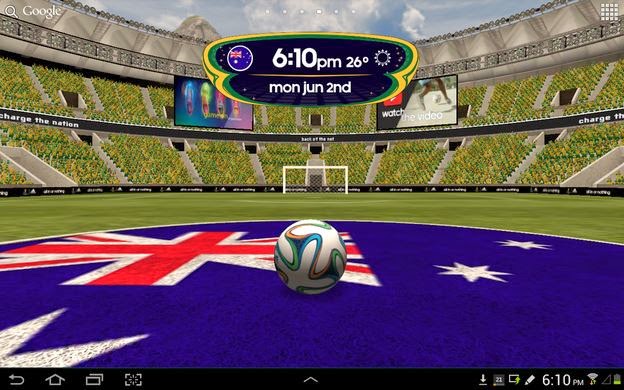
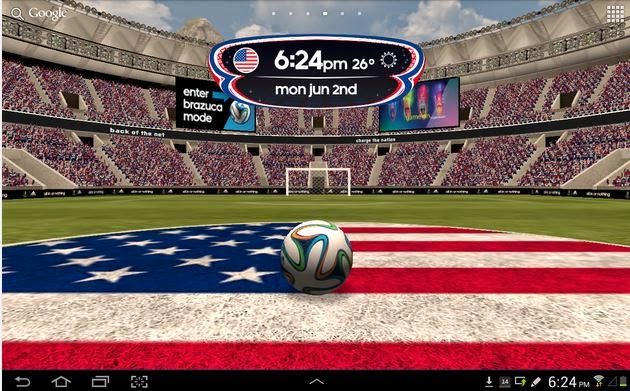
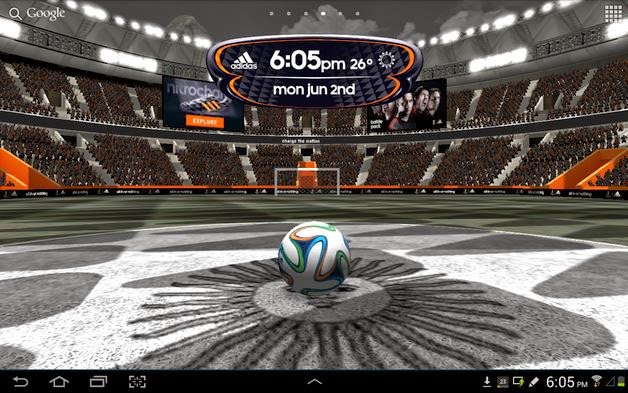
script async="" src="//pagead2.googlesyndication.com/pagead/js/adsbygoogle.js">
Features :
Choose Classic Pitch Mode 2D.
You can select between 200+ country flags to support your teams.
Text and Email Notifications by Adidas.
<
Download WORLD CUP 2014 Popular Live Wallpaper
Android beginner tutorial Part 86 Localization
In this part we will talk about application localization.
After deployment, your application may be used on Android devices in many regions. To get the most users, you should think about making your application suitable for people speaking different languages - in other words, you should localize it.
Localization is actually fairly easy to implement. Up until now, when we set labels to buttons and text values to textviews and other components, we stored those values in strings.xml file (except some individual cases where we simply hard-coded the text in the xml files for testing purposes). Localization system lets us create multiple string, audio, visual, etc. files for different regions.
By using the res/values/strings.xml file, youre setting the default values for all regions. When told to look for a resource, the Android system picks the one that suits the region of the user. If no such item exists, the default value is picked. Thats why if youre using resources in your application, you should always include all of the used values that would be used by default.
The default values stored in res/values/ directory should be using the most common language you expect your application users to speak. Normally, its English.
To set resources for other regions, use the values-<qualifiers> pattern to create new directories and store your resources there. The <qualifiers> can be replaced by one or a group of qualifiers (for example, we know we can store images for different pixel density using qualifiers such as mdpi, hdpi, etc.).
As the Android official docs state: the language is defined by a two-letter ISO 639-1 language code, optionally followed by a two letter ISO 3166-1-alpha-2 region code (preceded by lowercase "r").
Examples of such language codes are "en", "fr", "ca", as well as "en-rUS", "fr-rFR" and "fr-rCA".
This means that we can store values in directories like res/values/strings.xml, res/values-fr/strings.xml, res/values-ja/strings.xml, etc.
And that is pretty much it. Using this information youll be able to make a flexible Android application which adapts to the users region.
Thanks for reading!
Read more »
After deployment, your application may be used on Android devices in many regions. To get the most users, you should think about making your application suitable for people speaking different languages - in other words, you should localize it.
Localization is actually fairly easy to implement. Up until now, when we set labels to buttons and text values to textviews and other components, we stored those values in strings.xml file (except some individual cases where we simply hard-coded the text in the xml files for testing purposes). Localization system lets us create multiple string, audio, visual, etc. files for different regions.
By using the res/values/strings.xml file, youre setting the default values for all regions. When told to look for a resource, the Android system picks the one that suits the region of the user. If no such item exists, the default value is picked. Thats why if youre using resources in your application, you should always include all of the used values that would be used by default.
The default values stored in res/values/ directory should be using the most common language you expect your application users to speak. Normally, its English.
To set resources for other regions, use the values-<qualifiers> pattern to create new directories and store your resources there. The <qualifiers> can be replaced by one or a group of qualifiers (for example, we know we can store images for different pixel density using qualifiers such as mdpi, hdpi, etc.).
As the Android official docs state: the language is defined by a two-letter ISO 639-1 language code, optionally followed by a two letter ISO 3166-1-alpha-2 region code (preceded by lowercase "r").
Examples of such language codes are "en", "fr", "ca", as well as "en-rUS", "fr-rFR" and "fr-rCA".
This means that we can store values in directories like res/values/strings.xml, res/values-fr/strings.xml, res/values-ja/strings.xml, etc.
And that is pretty much it. Using this information youll be able to make a flexible Android application which adapts to the users region.
Thanks for reading!
Super K O Boxing 2 Android Game
Super K.O.Boxing 2
DOWNLOAD FULL ANDROID GAME
Friday, January 30, 2015
Android beginner tutorial Part 1 Introduction
This is the introduction part of the Android development tutorial series.
So far Ive written only Actionscript 3 tutorials for this blog. I believe it is time to move on to another technology, which Ive chosen to be Android. The language used here isnt AS3, its Java - a language Im sure youve heard of. The syntax is similar to Actionscript, but some things are different. The Android SDK itself is pretty complex too. It is not going to be easy to learn Android development, but, in my opinion, its definitely worth it.
Since this used to be an AS3 blog, I am going to assume that my readers are people with some knowledge of AS3 and are beginners to Android SDK like me. The official Android website offers a series of tutorial to get developers started, however it is aimed at Java programmers.
For the first few tutorials, I am going to basically show you how to do the same thing they show at their official website, but explaining every detail that would be unclear to people with no previous experience with Java, for example, Ill explain the differencies in syntax between AS3 and Java as we write code.
I will try to explain everything the way that a person with some previous AS3 experience would understand. This means when we encounter unusual and new techniques or syntax features, Ill compare them with AS3, make analogies and give examples of how the same functionality could be achieved with AS3. I believe this will be a good learning experience for both you, my readers, and myself too.
All the tools used in Android development are free. It is also very good if you have an android device you can debug the applications on. The Eclipse IDE, which we will be using, together with Android SDK provide virtual device emulators too, which will show us how the application looks on a phone or a tablet by emulating the device. This will especially be useful when we want to see how our application looks on devices with different screen sizes.
First thing we need to do is head to the android developer website and download the Android SDK together with Eclipse IDE. Click here to do that now.
Download the bundle, unpack the ZIP file somewhere (the IDE has no installer, just a standalone exe), and run the eclipse.exe located in eclipse folder. Theres the IDE with all the Android SDK tools already built-in!
Well start writing our first Hello World application in the next tutorial.
Thanks for reading!
Read more »
So far Ive written only Actionscript 3 tutorials for this blog. I believe it is time to move on to another technology, which Ive chosen to be Android. The language used here isnt AS3, its Java - a language Im sure youve heard of. The syntax is similar to Actionscript, but some things are different. The Android SDK itself is pretty complex too. It is not going to be easy to learn Android development, but, in my opinion, its definitely worth it.
Since this used to be an AS3 blog, I am going to assume that my readers are people with some knowledge of AS3 and are beginners to Android SDK like me. The official Android website offers a series of tutorial to get developers started, however it is aimed at Java programmers.
For the first few tutorials, I am going to basically show you how to do the same thing they show at their official website, but explaining every detail that would be unclear to people with no previous experience with Java, for example, Ill explain the differencies in syntax between AS3 and Java as we write code.
I will try to explain everything the way that a person with some previous AS3 experience would understand. This means when we encounter unusual and new techniques or syntax features, Ill compare them with AS3, make analogies and give examples of how the same functionality could be achieved with AS3. I believe this will be a good learning experience for both you, my readers, and myself too.
All the tools used in Android development are free. It is also very good if you have an android device you can debug the applications on. The Eclipse IDE, which we will be using, together with Android SDK provide virtual device emulators too, which will show us how the application looks on a phone or a tablet by emulating the device. This will especially be useful when we want to see how our application looks on devices with different screen sizes.
First thing we need to do is head to the android developer website and download the Android SDK together with Eclipse IDE. Click here to do that now.
Download the bundle, unpack the ZIP file somewhere (the IDE has no installer, just a standalone exe), and run the eclipse.exe located in eclipse folder. Theres the IDE with all the Android SDK tools already built-in!
Well start writing our first Hello World application in the next tutorial.
Thanks for reading!
Thursday, January 29, 2015
Crime Scene Investigation Android game for free
CSI:Crime Scene Investigation
Find hidden Objects and Crime.
Download full game for free now on Android
CSI is very popular Android game. Investigate as agent. Find hidden object to solve the case mistery. Find proof against criminals. The game based on American Tv series. The most popular TV series in USA. The game status was paid but now its free to download. Download and enjoy the best hidden object game on your smartphones and tablets.
Android Game Features :
- Investigate whole crime scene
- Find proofs and gather them.
- Get the Criminals.
- Internet required .
Status : Free
Download Paid Game for Free from PlayStore
Sunday, January 25, 2015
Rk3066 Acho PT 10 1 inch Android Tablet PC Firmware
Acho PT 10.1 inch
Rk3066 Android Tablet PC Firmware
Stock Rom
Wiki
Read article about Rockchip CPU on WikipediaWhen I need to Restore or Reset my Android Tablet Pc?
In Case of Following Situations you must restore your tablet to stock rom. Before flashing tablet this is highly recommended to use Android Tools .
1. Forgotten Pattern Lock .
2.Too many pattern attempts / Reset user lock.
3. Tablets PC stuck on Gmail account.
4. Android Tablets PC stuck on Android logo.
5. Tablet Android hang on start up / Multiple errors generating by OS.
6. Android Market having problems or generating errors.
7.Upgrading to new Android OS.
6. Android Market having problems or generating errors.
7.Upgrading to new Android OS.
Instructions:
you can use this Android Tablet firmware, Stock ROM to restore your Android China tablets to generic firmwares or upgrades . Make sure to charge battery . Power failure during flashing may result dead or broken tablets.
.
.
Note : Flashing generic tablet firmware should be last option.
Flashing Tutorials :
Read Before : Flashing Tutorial for Rockchip
Download Flashing Instructions : PDF
Drivers for Rockchip:
Download Drivers for Rockchip tablets
Flashing Tools:
Download: RKbatch ToolRecommended Tools:
you can also use:Android Tools for Rockchip TabletsDownloads:
Stock Firmware from Official page
Stock Rom provide by: Stock
Stock Rom provide by: Stock
4.1 JB
Not Rooted.
Tuesday, January 20, 2015
FIFA 14 Download 2014 FIFA WORLD CUP BRAZIL Android Game
FIFA 14
2014 FIFA WORLD CUP BRAZIL GAME
Download free game for Android

2014 FIFA WORLD CUP BRAZIL is most amazing football game available for Android by EA Sports . The most authentic games for smartphone and tablet PC. You can easily shoot,kick,pass and tackle player with touch. Featuring 33 Leagues , 600 teams and 34 stadiums. Build your own team by trading players. The 2014 FIFA WORLD CUP BRAZIL Android game is highly optimized for Tablets with stunning Graphics. All the 2014 FIFA WORLD CUP BRAZIL official teams are available to enjoy the game. Download 2014 FIFA WORLD CUP BRAZIL Android game for free and enjoy the World Cup 2014.
ScreenShots :
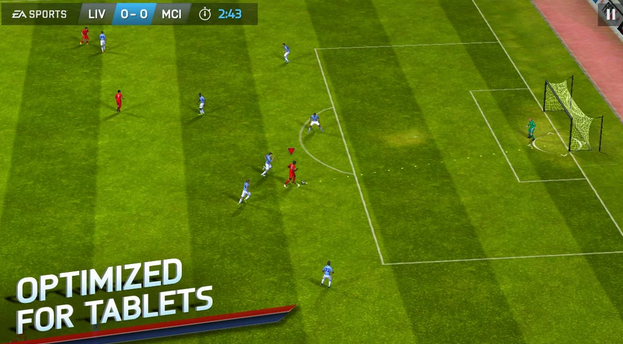
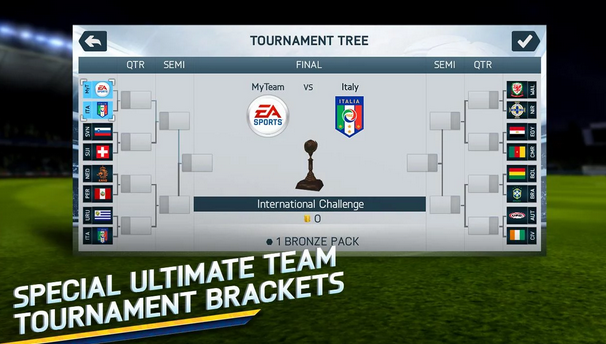


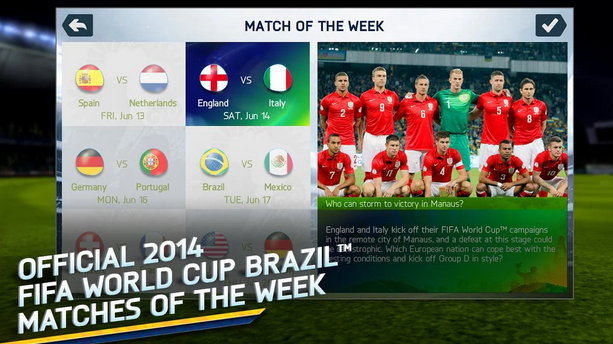


Game Requirements :
APK Size : 1.35 GBOS Supported : 2.3.3 and Up
Current Version: 1.3.6
Developer : EA Sports
Download 2014 Fifa World Cup Brazil Android Game
Monday, January 19, 2015
Onda vx610w 7” luxury version official Android 2 3 v2 0 5 firmware
Android 2.3 v2.0.5 firmware for Onda vx610w luxury v1 version.
What’s new:
1).Improve the ROM space to 1GB from 512MB;
2).Add more 3G dongles support;
3).Pre-installed app “Onda market”;
4).Pre-installed app “QQ game”;
5).Pre-installed app “Google Android Market”;
6).Optimized local video and online video play;
7).Improve stability of RJ45 ethernet internet;
8).Add more formats of external hard drive;
9).Add suport of IDX+SUB video subtitle;
10).Improve performance of camera;
11).Improve response of capacities touch screen;
Click here to download 2.3-v2.05
Before you do any firmware-install,please make sure your device is fully charged!
Saturday, January 17, 2015
CAT BASKET ANDROID FULL GAME
CAT BASKET ANDROID GAME
CLICK TO DOWNLOAD FREE GAME
Android beginner tutorial Part 36 Spinner selection management
In this tutorial we will learn how to handle user selection in Spinner widgets, as well as how to select items ourselves.
Well make it so that when the user selects an item in the Spinner, a TextView, which is located under the Spinner, displays the selected item. Well also add a button that, when clicked, will randomly choose and select one of the options in the Spinner.
Firstly, go to the Activity layout and add the necessary components:
Go to strings.xml and add a "button_random" item for the buttons label:
In the MainActivity.java class, implement OnItemSelectedListener interface:
Declare a text variable. Also declare spinner, which is already used in the code, but well declare it as a private variable this time:
Changes to make in the onCreate() function - apply value to text variable, declare a button variable, which references the "Choose randomly" button, add a listener for it, which sets the selection of the spinner randomly. Use the setSelection() method to do it. Use Math.round() and Math.random() to generate an index number. Use (int) in front of the number expression so that the setSelection() method comprehends it as an integer.
Add two functions - onItemSelected and onNothingSelected. The first one is executed when an item is selected in the Spinner. The second is executed when nothing is selected. This happens rarely. It can happen, for example, if the data provider for the spinner is empty.
Full code:
Thanks for reading!
Read more »
Well make it so that when the user selects an item in the Spinner, a TextView, which is located under the Spinner, displays the selected item. Well also add a button that, when clicked, will randomly choose and select one of the options in the Spinner.
Firstly, go to the Activity layout and add the necessary components:
<LinearLayout xmlns:android="http://schemas.android.com/apk/res/android"
    xmlns:tools="http://schemas.android.com/tools"
    android:layout_width="match_parent"
    android:layout_height="match_parent"
    android:orientation="vertical"
    tools:context=".MainActivity" >

<Spinner
    android:id="@+id/spinner"
    android:layout_width="fill_parent"
    android:layout_height="wrap_content"
    />

<TextView
    android:id="@+id/text"
    android:layout_width="fill_parent"
    android:layout_height="wrap_content" />

<Button
    android:id="@+id/button_random"
    android:layout_width="fill_parent"
    android:layout_height="wrap_content"
    android:text="@string/button_random" />

</LinearLayout>
Go to strings.xml and add a "button_random" item for the buttons label:
<?xml version="1.0" encoding="utf-8"?>
<resources>

    <string name="app_name">Code For Food Test</string>
    <string name="menu_settings">Settings</string>
    <string name="button_random">Choose randomly</string>
    <string-array name="choices_array">
        <item>One</item>
        <item>Two</item>
        <item>Three</item>
        <item>Four</item>
        <item>Five</item>
        <item>Seven</item>
        <item>Eight</item>
        <item>Nine</item>
        <item>Ten</item>
    </string-array>

</resources>
In the MainActivity.java class, implement OnItemSelectedListener interface:
public class MainActivity extends Activity implements OnItemSelectedListener{
Declare a text variable. Also declare spinner, which is already used in the code, but well declare it as a private variable this time:
private TextView text;
private Spinner spinner;
Changes to make in the onCreate() function - apply value to text variable, declare a button variable, which references the "Choose randomly" button, add a listener for it, which sets the selection of the spinner randomly. Use the setSelection() method to do it. Use Math.round() and Math.random() to generate an index number. Use (int) in front of the number expression so that the setSelection() method comprehends it as an integer.
@Override
protected void onCreate(Bundle savedInstanceState) {
super.onCreate(savedInstanceState);
setContentView(R.layout.activity_main);

spinner = (Spinner)findViewById(R.id.spinner);
text = (TextView)findViewById(R.id.text);

String[] choices = getResources().getStringArray(R.array.choices_array);

ArrayAdapter<String> arrayAdapter = new ArrayAdapter<String>(this, android.R.layout.simple_spinner_item, choices);
arrayAdapter.setDropDownViewResource(android.R.layout.simple_spinner_dropdown_item);
spinner.setAdapter(arrayAdapter);
spinner.setOnItemSelectedListener(this);

Button button = (Button)findViewById(R.id.button_random);
button.setOnClickListener(new View.OnClickListener() {

@Override
public void onClick(View v) {
spinner.setSelection((int)Math.round(Math.random()*8));
}
});

}
Add two functions - onItemSelected and onNothingSelected. The first one is executed when an item is selected in the Spinner. The second is executed when nothing is selected. This happens rarely. It can happen, for example, if the data provider for the spinner is empty.
public void onItemSelected(AdapterView<?> parent, View view, int pos, long id) {
    text.setText("The selected item is " + parent.getItemAtPosition(pos).toString());
    }

public void onNothingSelected(AdapterView<?> parent) {
    text.setText("Nothing is selected!");
    }
Full code:
package com.kircode.codeforfood_test;

import android.app.Activity;
import android.os.Bundle;
import android.view.Menu;
import android.view.View;
import android.widget.AdapterView;
import android.widget.AdapterView.OnItemSelectedListener;
import android.widget.ArrayAdapter;
import android.widget.Button;
import android.widget.Spinner;
import android.widget.TextView;

public class MainActivity extends Activity implements OnItemSelectedListener{

private TextView text;
private Spinner spinner;

@Override
protected void onCreate(Bundle savedInstanceState) {
super.onCreate(savedInstanceState);
setContentView(R.layout.activity_main);

spinner = (Spinner)findViewById(R.id.spinner);
text = (TextView)findViewById(R.id.text);

String[] choices = getResources().getStringArray(R.array.choices_array);

ArrayAdapter<String> arrayAdapter = new ArrayAdapter<String>(this, android.R.layout.simple_spinner_item, choices);
arrayAdapter.setDropDownViewResource(android.R.layout.simple_spinner_dropdown_item);
spinner.setAdapter(arrayAdapter);
spinner.setOnItemSelectedListener(this);

Button button = (Button)findViewById(R.id.button_random);
button.setOnClickListener(new View.OnClickListener() {

@Override
public void onClick(View v) {
spinner.setSelection((int)Math.round(Math.random()*8));
}
});

}

public void onItemSelected(AdapterView<?> parent, View view, int pos, long id) {
    text.setText("The selected item is " + parent.getItemAtPosition(pos).toString());
    }

public void onNothingSelected(AdapterView<?> parent) {
    text.setText("Nothing is selected!");
    }


@Override
public boolean onCreateOptionsMenu(Menu menu) {
// Inflate the menu; this adds items to the action bar if it is present.
getMenuInflater().inflate(R.menu.activity_main, menu);
return true;
}

}
Thanks for reading!
Subscribe to:
Posts (Atom)
