Wednesday, March 11, 2015
Crowd Sourcing with Google Forms and Fusion Tables
Crowd sourcing has been growing substantially in popularity. More and more businesses and individuals are interested in gathering data from the general public for real-time data analysis and visualization. The concept is being adopted in several fields, including journalism, public health and safety, and business development. During this election year, for example, a journalist might be interested in learning what candidate his or her readers support, and the reasons why they support this candidate.
Google Forms, Fusion Tables, and Apps Script make both data collection and analysis super simple! Using Google Forms, a journalist can quickly create an HTML form for readers to submit their opinions and feedback. Fusion Tables make data analysis easy with several cool data visualization options. Apps Script acts as the glue between Google Forms and Fusion Tables, enabling the Form to send data directly to Fusion Tables.
Let’s take a look at how our journalist friend would use all these tools to collect her reader’s candidate preferences.
Google Forms
Google Forms provides a simple UI tool to develop forms perfect for collecting data from readers. Here’s an example of a simple form the journalist can create to get information from her readers:

Once the form has been created, it can be embedded directly into the journalist’s website or blog using the embeddable HTML code provided by Google Forms.
Google Fusion Tables
Google Fusion Tables makes data analysis simple with its visualization capabilities. Using Fusion Tables, the journalist can create maps and charts of the collected data with just a few clicks of the mouse!
Using some fake data as an example, here’s a pie chart that can be created using Fusion Tables to show the the results of the survey:

With Fusion Tables, it’s also easy to filter data and create a pie chart visualization showing why people like Mitt Romney:

These visualizations can also be embedded in the journalist’s website or blog, as Fusion Tables provides embeddable HTML code for all its visualizations. Now, any time someone visits the webpage with the embedded visualization, they will see the current poll result!
Apps Script
Finally, Apps Script acts as the glue between the Google Form and the Fusion Table, since there is currently no direct way to send Google Form submissions to a Fusion Table. During a hack event last year, I took some time to write an Apps Script script that submits the form data to Fusion Tables. The script uses the onFormSubmit Apps Script functionality as described in this blog post. The Fusion Tables code is based on the code described in this blog post.
To learn how to set up your own Google Form to collect data and save that data in a Fusion Table, please see these instructions.
 | Kathryn Hurley profile Kathryn is a Developer Programs Engineer for Fusion Tables at Google. In this role, she helps spread the word about Fusion Tables by presenting at conferences and developer events. Kathryn received an MS in Web Science from the University of San Francisco. Prior work experience includes database management, web production, and research in mobile and peer-to-peer computing. |

How to integrate with Google Apps and get listed on Google Apps Marketplace
If you already have a great web app or even just an idea for one and would like to learn more about integration with Google Apps, join us for a webinar next Wednesday. Well review the Marketplace and Google Apps APIs and answer technical and policy questions from attendees.
Integrate with Google Apps and the Google Apps Marketplace
Wednesday, March 17, 2010
9:00 a.m. PDT
This webinar will include a question and answer session. Post and vote for questions ahead of time and register for the webinar here. We hope youll join us for this informative online event.
UPDATE @ 5:30pm PST: Weve corrected the registration link.
Monday, March 9, 2015
Interact with your Google Docs List from Apps Script
For instance, take a company whose website is hosted on Google Sites. They have a Specials page where they want to list seasonal sales depending on upcoming holidays. They store the details about the seasonal sales in plain-text files that are saved in their Google Docs List. By using the Google Docs List and and Sites services within Apps Script along with time-based triggers to run the script once per day, they can keep their Specials page updated automatically. Here’s a code snippet that demonstrates how to update the Specials page:
//The Mother’s Day sale runs from May 1 - May 7, 2011
var MOTHERS_DAY_START = new Date("May 1, 2011");
var MOTHERS_DAY_END = new Date("May 7, 2011");
//The Valentine’s Day sale runs from Feb 6 - Feb 13, 2011
var VALENTINES_DAY_START = new Date("February 6, 2011");
var VALENTINES_DAY_END = new Date("February 13, 2011");
function updateSpecials() {
var today = new Date();
var site = SitesApp.getSite("example.com", "giftshop");
// Get all the web pages in the Site
var pages = site.getWebPages();
// Loop through the web pages to find the specials page
for (var i = 0; i < pages.length; i++) {
if (pages[i].getPageName() == "specials") {
var page = pages[i];
}
}
// Set up the default wording for the specials page
var pageText = "There are no specials at this time.";
// If today’s date is within the Mother’s Day sale range
if (today >= MOTHERS_DAY_START && today <= MOTHERS_DAY_END) {
// Find the sale text that’s stored in the file mom.txt
pageText = DocsList.find("mom.txt")[0].getContentAsString();
}
// If today’s date is within the Valentine’s Day sale range
else if (today >= VALENTINES_START && today <= VALENTINES_END ) {
// Find the sale text that’s stored in the file valentines.txt
var pageText = DocsList.find("valentines.txt")[0].getContentAsString()
}
// Set the content of the specials page
page.setContent(pageText);
}

If this script is then set up to run using a trigger that calls it at the same time each day, then the Specials page will be kept automatically up-to-date.
To help you learn more, weve created a tutorial that demonstrates how to search and display information about files, create files, and read content from files.
Note that certain features of the DocsList service, such as creating files, are only available to Google Apps accounts. For complete information on interacting with your Google Docs List using Apps Script, see the DocsList Service documentation.
We look forward to seeing how you use this integration. If youd like to learn more about Apps Script and meet the Apps Script team in person, join us at the upcoming Apps Script hackathon in New York City on June 24.
Wednesday, February 25, 2015
Back to School with No David!

I included 10 different writing options... perfect for all of the elementary grades:
- David’s Body – without any text
- David’s Body – with Name/Date on arms and room for an illustration
- David’s Body – with large primary writing lines and room for a picture
- David’s Body – with medium primary writing lines and room for a picture
- David’s Body – with small primary writing lines and room for a picture
- David’s Body – with writing lines and room for a picture
- David’s Body – with large primary writing lines, no room for a picture
- David’s Body – with medium primary writing lines, no room for a picture
- David’s Body – with small primary writing lines, no room for a picture
- David’s Body – with writing lines, no room for a picture
There are also additional writing pages available for each of the levels so that your students can attach multiple pages on their puppet!
It also has two options in terms of the thickness of lines... As far as the line thickness, I like to use thicker lines with my Kindergarten students so that they can color in the lines easier, and in the past I’ve used thinner lines with older students so that they don’t assume you’re giving them a “baby” coloring page!
Check it out at TPT by clicking the picture above! Its $4, but theres a big sale coming up at TPT, so you can get it at a discount very soon! Click the picture below to see my store!

Tuesday, February 17, 2015
ACOOLSOFT PPT TO VIDEO PRO 3 2 8 5 WITH SERIAL KEY

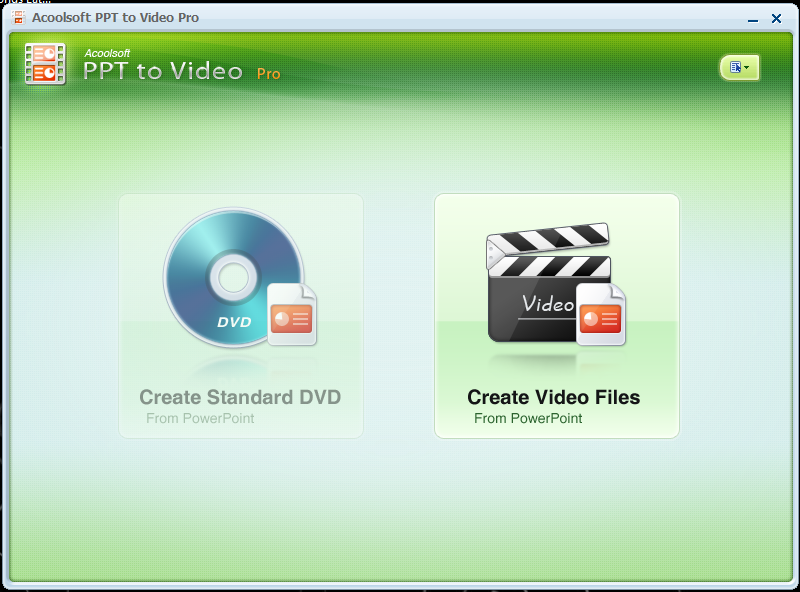
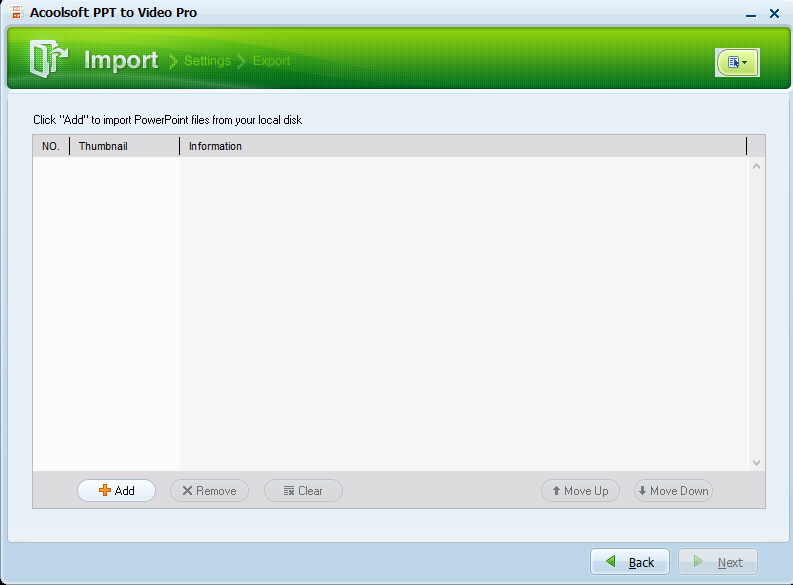
Acoolsoft PPT to Video Pro is a professional PowerPoint to video converter which empowers you to easily convert PowerPoint to video in popular formats such as MPEG, AVI, MP4, WMV, 3GP, FLV and MOV. With only a few mouse clicks, you can convert your PowerPoint presentations to dynamic video with all transitions, animations, sounds, and movie clips retained.
System requirements:
Windows XP/2003/Vista/7 and 8
Screen Shots: Click on the image to vow large screen
 |  |  |
Friday, February 13, 2015
Reading binary data NSIDC Sea Ice Concentrations into GeoTIFF raster with Python
The blog entry, which helped med finding out how to do this is this one but it had to be modified for my files.
Part One uses the Python struct command to unpack he binary file into a tuple
import struct, numpy, gdalThe "unpack_from" considers the offset of the header bytes and the tuple "z" contains now all the values in one long row of values -- this one-dimensional string of values is converted into an array and the reshaped according to the dimensions of the raster. Now I have my values in a two-dimensional array, the next part of the code writes it into a GeoTIFF file:
#Dimensions from https://nsidc.org/data/docs/daac/nsidc0051_gsfc_seaice.gd.html
height = 448
width = 304
#for this code, inspiration found at https://stevendkay.wordpress.com/category/python/
icefile = open(r"U:SSMI
t_20120101_f17_v01_n.bin", "rb")
contents = icefile.read()
icefile.close()
# unpack binary data into a flat tuple z
s="%dB" % (int(width*height),)
z=struct.unpack_from(s, contents, offset = 300)
nsidc = numpy.array(z).reshape((448,304))
nsidc = numpy.rot90(nsidc, 1)
#write the data to a GeotiffThis then is the resulting and imported image:
driver = gdal.GetDriverByName("GTiff")
outraster = driver.Create(C:UsersmaxDesktop\test4.tif, height, width, 1, gdal.GDT_Int16 )
raster = numpy.zeros((width, height), numpy.float)
outraster.GetRasterBand(1).WriteArray( raster )
outband = outraster.GetRasterBand(1)
#Write to file
outband.WriteArray(nsidc)
outband.FlushCache()
#Clear arrays and close files
outband = None
iceraster = None
outraster = None
outarray = None

Tuesday, February 3, 2015
Insert Vimeo Youtube videos in PowerPoint slides with authorSTERAM Desktop 2 0
Most amazing thing which authorSTREAM has done is its advance search and filters. authorSTREAM not only allows you to search images on different parameters like color, size or type but also on the basis of licensing information. You can search creative commons stuff from Flickr and that too without leaving the PowerPoint. authorSTREAM also inserts the attribution text in the slides along with the images to help users get rid of some of the copyright worries.You can also create a collection of selected images or videos to be used later in the slides.
authorSTREAM Desktop with the addition of more video and image search APIs should help PowerPoint users create effective presentation with just few clicks.
Monday, February 2, 2015
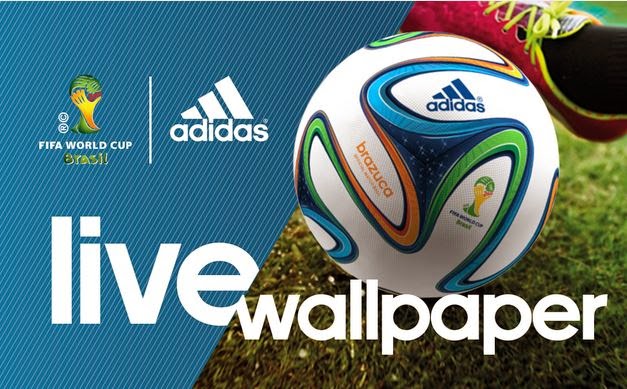
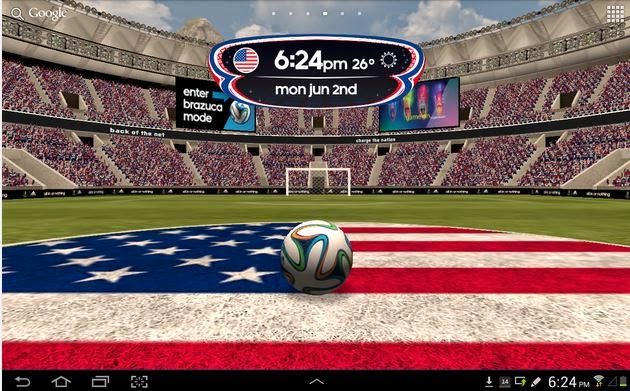
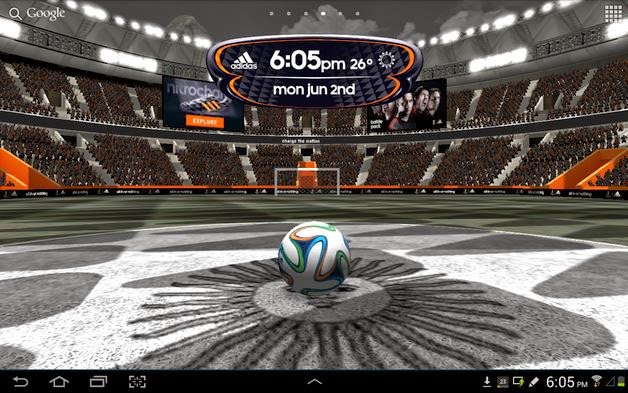
Fifa World Cup 2014 with Android Live Wallpaper
ADIDAS FIFA WORLD CUP 2014
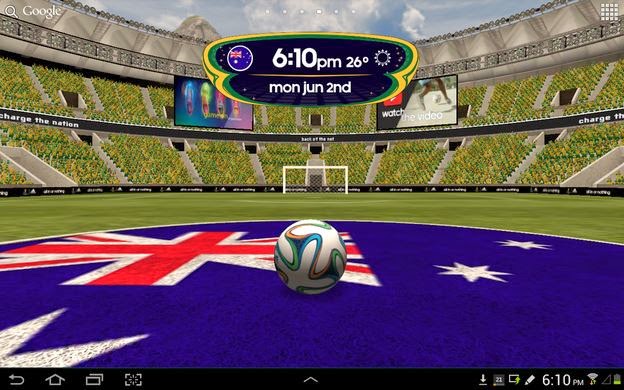
Live Wallpaper and Clock Widget App
Screen Shots :
Features :
Monday, January 26, 2015
Summernote WYSWIG Editor PHP Tutorial with Full Code
SummerNote is an Open source free wyswig editor build to support of Bootstrap theme framework.
Requirements
- JQuery
- Bootstrap
- SummerNote JS & CSS
- Fontawesome (Optional)
Following is tested in Chrome, Firefox and IE.
 |
| Full Featured WysWig Editor |
 |
| Responsive View on small screen |
<!DOCTYPE html PUBLIC "-//W3C//DTD XHTML 1.0 Strict//EN"
    "http://www.w3.org/TR/xhtml1/DTD/xhtml1-strict.dtd">
<html xmlns="http://www.w3.org/1999/xhtml" xml:lang="en" lang="en">
<script src="//code.jquery.com/jquery-1.9.1.js"></script>
  <!-- include libraries BS3 -->
<link rel="stylesheet" href="//netdna.bootstrapcdn.com/bootstrap/3.0.3/css/bootstrap.min.css" />
<script type="text/javascript" src="//netdna.bootstrapcdn.com/bootstrap/3.0.3/js/bootstrap.min.js"></script>
<link rel="stylesheet" href="//netdna.bootstrapcdn.com/font-awesome/4.0.3/css/font-awesome.min.css" />

<link rel="stylesheet" type="text/css" href="//cdnjs.cloudflare.com/ajax/libs/codemirror/3.20.0/codemirror.min.css" />
<link rel="stylesheet" href="//cdnjs.cloudflare.com/ajax/libs/codemirror/3.20.0/theme/blackboard.min.css">
<link rel="stylesheet" href="//cdnjs.cloudflare.com/ajax/libs/codemirror/3.20.0/theme/monokai.min.css">
<script type="text/javascript" src="//cdnjs.cloudflare.com/ajax/libs/codemirror/3.20.0/codemirror.js"></script>
<script src="//cdnjs.cloudflare.com/ajax/libs/codemirror/3.20.0/mode/xml/xml.min.js"></script>
<script src="//cdnjs.cloudflare.com/ajax/libs/codemirror/2.36.0/formatting.min.js"></script>

<!-- include summernote css/js-->
<link href="include/summernote.css" / rel="stylesheet">
<script src="include/summernote.min.js"></script>
<script>
    $(document).ready(function() {
        $(#summernote).summernote({
            height: 500
        });
    });
</script>
<head>
    <title>Bootstrap WysWig Editor Summernote</title>
    <meta http-equiv="content-type" content="text/html;charset=utf-8" />
</head>

<body>
    <div class="container">
            <div class="row">
                <form class="span12" id="postForm" action="/whateveryouwant.php" method="POST" enctype="multipart/form-data" >
                    <fieldset>
                        <legend>MyCodde.Blogspot.com Editor</legend>
                        <p class="container">
                            <textarea class="input-block-level" id="summernote" name="content" rows="18">
                            </textarea>
                        </p>
                    </fieldset>
                    <button type="submit" class="btn btn-primary">Save changes</button>
                </form>
            </div>
    </div>
</body>
</html>
I have tested this in Internet Explorer 7, but style broken. From IE 8 it is working perfectly.
How to add Instant Image Upload inside Editor
 |
| Drag and Drop Image Upload Feature in summernote |
Use php move_auploaded_file() function to save the uploaded data to your server.
    $(document).ready(function() {
        $(#summernote).summernote({
            height: 200,
            onImageUpload: function(files, editor, welEditable) {
                sendFile(files[0], editor, welEditable);
            }
        });
        function sendFile(file, editor, welEditable) {
            data = new FormData();
            data.append("file", file);//You can append as many data as you want. Check mozilla docs for this
            $.ajax({
                data: data,
                type: "POST",
                url: savetheuploadedfile.php,
                cache: false,
                contentType: false,
                processData: false,
                success: function(url) {
                    editor.insertImage(welEditable, url);
                }
            });
        }
    });
savetheuploadedfile.php
<?php

//TODO List
// 1) Rename the File
// 2) For Multiple Upload , Loop through $_FILES
$dir_name = "uploads/";
    move_uploaded_file($_FILES[file][tmp_name],$dir_name.$_FILES[file][name]);
    echo $dir_name.$_FILES[file][name];
?>

Thats it.
Tuesday, January 13, 2015
Touchscreens Used with Smartphones

TFT LCD Display (Thin Film Transistor Liquid Crystal Display)
This is the most widely used display technology at present. TFT LCD technology ensures the clear view. It is better than old LCD technology to view High Quality pictures and video.
This type of display is relatively cheaper. So it can be used in low-priced phones too.
But this technology has some limitations too. You cant operate your phone in sunlight. Your display will be almost unseen when youre in daylight. And this type of display consumes too much battery. You should keep the display off as much time as possible.
IPS LCD Display (In-Plane Switching LCD)
IPS LCD is better than TFT LCD Display Technology. No matter how you wanna see it. You can get a clear view from any angle. It doesnt consume much power. Thats why it saves your battery power.
Manufacturing cost is little bit higher and used with medium-priced cell phones.
Resistive Touchscreen Display (Dont Call it RTS!)
Ive searched Google by RTS. Actually it has no short form. You should call it Resistive Touchscreen Display.
In this technology, there are two layers in the screen. And there is a minor gap between the two layers. Whenever the first layer get your touch, the blank space between two layers blends and pressure the second layer. Immediately the processor gets signal. Thus Resistive Display Technology works.
You can operate the phone using fingers or stylus. But using a stylus will be more comfortable.
Capacitive Touchscreen Display
If you wanna operate your phone with fingers then capacitive display is more comfortable than resistive display. As made for operating with fingers, you cant use stylus or something else to work with capacitive display.
This display ensures fast response time. Manufacturing cost is also high. This display is used with high-priced smartphones.
OLED Display (Organic Light Emitting Diode)
Most of you maybe familiar with only LED - Light Emitting Diode. More than a year ago, I wrote a post about the difference between LCD and LED. OLED is the improved version of LED technology.
OLED is a high quality display technology for cell phones and monitors. It gives you a bright look. This type of display is very light and viewing angle is excellent. It supports 16 million colors and reponse time is very short.
OLED display consumes less power and thus it saves your battery.
AMOLED Display (Active Matrix LED)
Active Matrix OLED is a display technology that is used with mobile devices and televisions. It is actually an improved version of OLED.
One of the great features of this display is the viewing capacity in sunlight. Users can see the screen in daylight without any problem. AMOLED ensures vivid picture with super sensitive screen.
As the manufacturing cost is relatively higher, this type of display is used with high end mobile devices.
Super AMOLED Display
Next to the AMOLED is Super AMOLED. It is nothing but the improved version of AMOLED developed by Samsung. This technology is used with the galaxy series devices.
Super AMOLED includes the following features:
- Light and thin
- Vivid Display
- Faster Reponsive Capacity
- Less Power Consuming