Showing posts with label 8. Show all posts
Showing posts with label 8. Show all posts
Tuesday, February 17, 2015
ACOOLSOFT PPT TO VIDEO PRO 3 2 8 5 WITH SERIAL KEY

Acoolsoft PPT to Video Pro is a professional PowerPoint to video converter which empowers you to easily convert PowerPoint to video in popular formats such as MPEG, AVI, MP4, WMV, 3GP, FLV and MOV. With only a few mouse clicks, you can convert your PowerPoint presentations to dynamic video with all transitions, animations, sounds, and movie clips retained.
System requirements:
Windows XP/2003/Vista/7 and 8
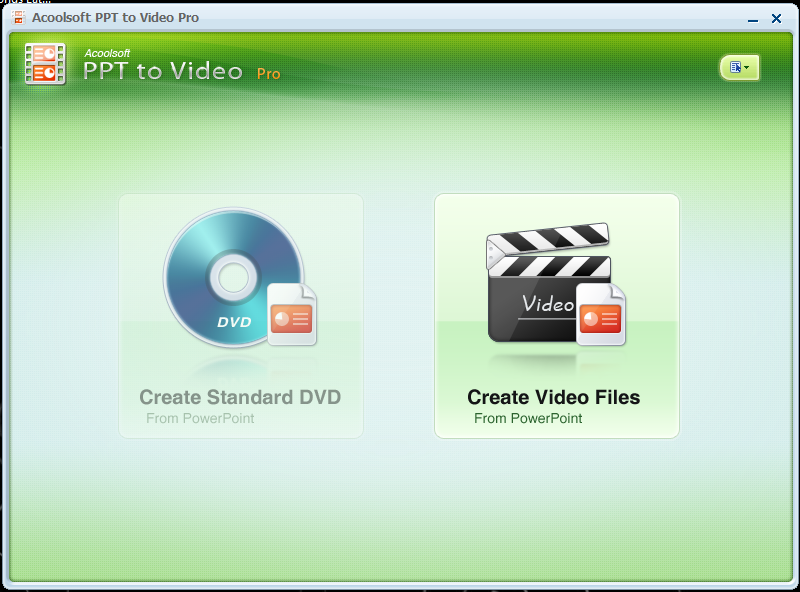
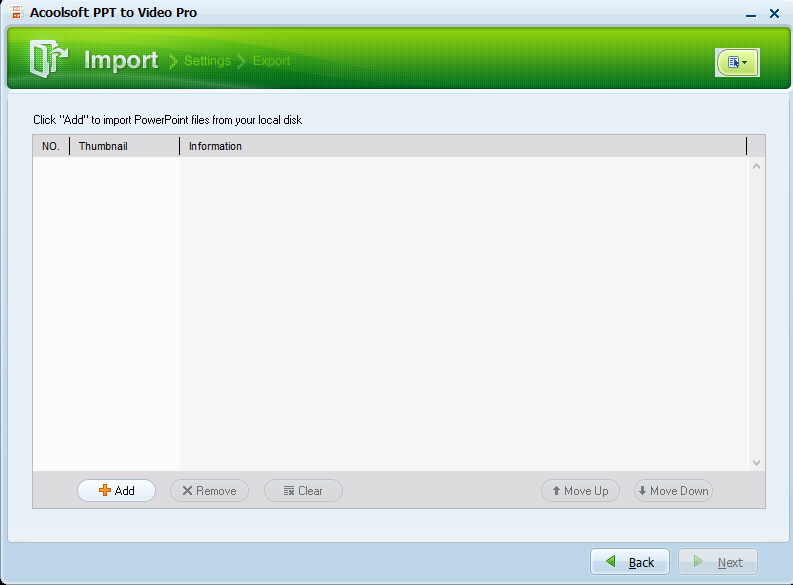
Screen Shots: Click on the image to vow large screen
 |  |  |
I hope you like it......!

Tuesday, February 10, 2015
HowTo Install ImageMagick 6 8 7 Q16 64bit to ActivePerl 5 16 3 in Windows 7
Step 1: run the installer

Step 2: a User Account Control window will pop-up, click YES
Step 3: press next

Step 4: select the "I accept the agreement"

Step 5: press next

Step 6: press next

Step 7: press next

Step 8: put a check on the "Install PerlMagick for ActiveState Perl v 5.16.3, then press next

Step 9: press install

Step 10: wait for installation

Step 11: this command prompt will pop-up, DO NOT CLOSE it, it will close by itself!!

Step 12: if you see this window, click next

Step 13: uncheck the "view index.html", then press Finish!!

Installation is now complete, you can now add the Image::Magick module by adding the line below to your perl script!
use Image::Magick;
Read more »
Step 2: a User Account Control window will pop-up, click YES
Step 3: press next
Step 4: select the "I accept the agreement"
Step 5: press next
Step 6: press next
Step 7: press next
Step 8: put a check on the "Install PerlMagick for ActiveState Perl v 5.16.3, then press next
Step 9: press install
Step 10: wait for installation
Step 11: this command prompt will pop-up, DO NOT CLOSE it, it will close by itself!!
Step 12: if you see this window, click next
Step 13: uncheck the "view index.html", then press Finish!!
Installation is now complete, you can now add the Image::Magick module by adding the line below to your perl script!
use Image::Magick;
Friday, January 30, 2015
O 8 52 stock rom to unbrick your phone
Hey ho!,Im done uploading the stock rom for O+ 8.52... I have also uploaded a video on how to flash your O+ 8.52. After flashing your phone, make sure to hard reset your phone.

Firmware Here -->O+ 8.52
VCOM Driver -->VCOM Manual
Alternative Driver --> AutoInstaller
Alternative Driver --> AutoInstaller
SPFlashTool --> SPFlashTool
SPFlashTool --> LatestVersion
"Extract the files to your desired folder" See picture below"
"If you encounter error in flashtool, use different version of it."

Installing Driver
First try the Alternative Driver, which is the AutoInstaller. Just open the install.bat then it will automatically install the driver. Then proceed to flashing. If it did not work then proceed with VCOM driver that you had downloaded. Then install it manually follow the guide below.
Video Reference using Driver Auto Installer (watch in HD)
When installing it manually your phone must be turned off, then connect it to your computer/laptop while pressing VOLUME UP or VOLUME DOWN. This will detect and look for the driver.

1. This is the first time that you will connect your phone and it will search for the correct driver.

2. Check include this location ... ... and click on browse. Look for USB VCOM Driver and Click on 2K_XP_COM folder if you are using Windows XP or Win7 for Windows 7 and then press OK when you are done picking the right folder for the driver.

3. If the driver is successfully installed MediaTek DA USB VCOM will appear in the New Hardware Wizard.
Video Installing VCOM Driver (please watch in HD)
Video Flashing your phone (please watch in HD)
Your phone must be turned off when Flashing
Flashing
1. Launch FlashTool
2. Click on Scatter-Loading, and load your scatter file. (see example below with loaded file in Flash Tool


Video Reference Using FlashTool version 5.xxx (watch in HD)
3. After you load the file, press F9 or Press Download to Flash your Phone.
4. If Download is not possible, you can press Firmware Upgrade.
5. After you press Download or Firmware Upgrade re-insert your battery and connect your Phone to the PC. Press Volume Down or Volume Up while connecting to PC.
"Hard reset your phone after flashing"
I hope this tutorial help you. Please drop a comment if something is not clear to you.
Saturday, January 24, 2015
O 8 36z firmware stock rom to unbrick your phone
This firmware is for O+ 8.36z, you can flash this firmware / stock rom via Flashtool. It has already the CWM or Clock Work Mod Recovery, so if you cant to install custom you can use it.
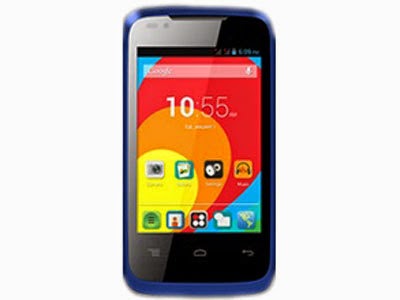
Firmware Here -->O+ 8.36z
"Extract the files to your desired folder" See picture below"
"If you encounter error in flashtool, use different version of it."
Installing Driver
First try the Alternative Driver, which is the AutoInstaller. Just open the install.bat then it will automatically install the driver. Then proceed to flashing. If it did not work then proceed with VCOM driver that you had downloaded. Then install it manually follow the guide below.
Video Reference using Driver Auto Installer (watch in HD)
When installing it manually your phone must be turned off, then connect it to your computer/laptop while pressing VOLUME UP or VOLUME DOWN. This will detect and look for the driver.
1. This is the first time that you will connect your phone and it will search for the correct driver.
3. If the driver is successfully installed MediaTek DA USB VCOM will appear in the New Hardware Wizard.
Video Flashing your phone (please watch in HD)
Flashing
Video Reference Using FlashTool version 5.xxx (watch in HD)
3. After you load the file, press F9 or Press Download to Flash your Phone.
"Hard reset your phone after flashing"
I hope this tutorial help you. Please drop a comment if something is not clear to you.
Read more »
Firmware Here -->O+ 8.36z
VCOM Driver -->VCOM Manual
Alternative Driver --> AutoInstaller
Alternative Driver --> AutoInstaller
SPFlashTool --> SPFlashTool
SPFlashTool --> LatestVersion
"Extract the files to your desired folder" See picture below"
"If you encounter error in flashtool, use different version of it."
Installing Driver
First try the Alternative Driver, which is the AutoInstaller. Just open the install.bat then it will automatically install the driver. Then proceed to flashing. If it did not work then proceed with VCOM driver that you had downloaded. Then install it manually follow the guide below.
Video Reference using Driver Auto Installer (watch in HD)
When installing it manually your phone must be turned off, then connect it to your computer/laptop while pressing VOLUME UP or VOLUME DOWN. This will detect and look for the driver.
1. This is the first time that you will connect your phone and it will search for the correct driver.
2. Check include this location ... ... and click on browse. Look for USB VCOM Driver and Click on 2K_XP_COM folder if you are using Windows XP or Win7 for Windows 7 and then press OK when you are done picking the right folder for the driver.
3. If the driver is successfully installed MediaTek DA USB VCOM will appear in the New Hardware Wizard.
Video Installing VCOM Driver (please watch in HD)
Video Flashing your phone (please watch in HD)
"Your Phone must be turned off when you are ready to connect and flash your phone"
Flashing
1. Launch FlashTool
2. Click on Scatter-Loading, and load your scatter file. (see example below with loaded file in Flash Tool
Video Reference Using FlashTool version 5.xxx (watch in HD)
3. After you load the file, press F9 or Press Download to Flash your Phone.
4. If Download is not possible, you can press Firmware Upgrade.
5. After you press Download or Firmware Upgrade re-insert your battery and connect your Phone to the PC. Press Volume Down or Volume Up while connecting to PC.
"Hard reset your phone after flashing"
I hope this tutorial help you. Please drop a comment if something is not clear to you.
Monday, January 12, 2015
Index Drives to Search Files Faster on Windows 8

If you have switched to Windows 8 from Windows 7, you might notice that search option is not very strong. When you search something on Windows 8 it doesnt show the files stored on Hard Disk. It only searches on some specific locations. Because other hard drives are not automatically indexed.
If you wanna enhance your search experience then you should index all the drives of your computer in the indexing service. If your drives are indexed then your search item will appear immediately as you type.
Okay lets start:
- Go to Control Panel (Hint: Start + R > type Control > press Enter)
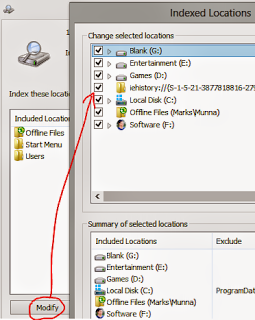
- Hit on the Indexing Options
- Click on Modify button
- Select all the Drives as shown in the image below
- Hit OK
- Thats it. Now within few hours your all files and folders will be indexed to the indexing service.
Note: If you wanna omit any drive from indexing then unmark it.
Stay with Marks PC Solution to get more interesting IT topics!
Subscribe to:
Posts (Atom)