Wednesday, March 11, 2015
4 ways to do Mail Merge using Google Apps Script
Update (August 2014): Try the Yet Another Mail Merge add-on for Google Sheets.
Editor’s Note: This blog post is co-authored by James, Steve and Romain who are Google Apps Script top contributors. -- Ryan Boyd
The Google Apps Script team is on a roll and has implemented a ton of new features in the last few months. Some of us “Top Contributors” thought it will be a useful exercise to revisit the Mail Merge use case and discuss various ways in which we can do Mail Merge using Apps Script. Below are several techniques that tap into the power of Google Apps Script by utilizing Gmail, Documents and Sites to give your mailings some zing. Mail Merge is easy and here is how it can be done.
1. Simple Mail Merge using a Spreadsheet
The Simple Mail Merge tutorial shows an easy way to collect information from people in a Spreadsheet using Google Forms then generate and distribute personalized emails. In this tutorial we learn about using “keys,” like ${"First Name"}, in a template text document that is replaced by values from the spreadsheet. This Mail Merge uses HTML saved in the “template” cell of the spreadsheet as the content source.
2. Mail Merge using Gmail and Spreadsheet Services
The Gmail Service is now available in Google Apps Script, allowing you to create your template in Gmail where it is saved as a draft. This gives us the advantage of making Mail Merge more friendly to the typical user who may not know or care much about learning to write HTML for their template. The mail merge script will replace the draft and template keys with names and other information from the spreadsheet and automatically send the email.
To use this mail merge, create a new spreadsheet, and click on Tools > Script Gallery. Search for “Yet another Mail Merge” and you will be able to locate the script. Then, click Install. You’ll get two authorization dialogs, click OK through them. Add your contact list to the spreadsheet, with a header for each column. Then compose a new mail in Gmail. Follow this syntax for the “keys” in your template: $%column header% (see above). Click Save now to save your draft. Go back to your spreadsheet and click on the menu Mail Merge. A dialog pops up. Select your draft to start sending your emails.
You can add CCs, include attachments and format your text just as you would any email. People enjoy “Inserting” images in the body of their emails, so we made sure to keep this feature in our updated mail merge. To automate this process we will use a new advanced parameter of the method sendEmail, inlineImages. When the script runs it looks in the email template for images and make sure they appear as inline images and not as attachments. Now your emails will look just as you intended and the whole process of mail merge got a whole lot simpler.
3. Mail Merge using Document Forms
The next Mail Merge will use a template that is written in a Google Document and sent as an attachment. Monthly reports, vacation requests and other business forms can use this technique. Even very complex documents like a newsletter or brochure can utilize the automation of Google Apps Script to add the personal touch of having your patron’s name appear as a salutation.
Like in the Mail Merge for Gmail, the Google Docs template will use “keys” as placeholders for names, addresses or any other information that needs to be merged. Google Apps Script can add dynamic elements as well. For example you may want to include a current stock quote using the Financial Service, a chart from the Charts Service, or a meeting agenda automatically fetched for you by the Calendar Service.
As the code sample below demonstrates, the Google Apps Script gets the document template, copies it in a new temporary document, opens the temp document, replaces the key placeholders with the form values, converts it to PDF format, composes the email, sends the email with the attached PDF and deletes the temp document.
Here is a code snippet example to get you started. To use this mail merge, create a new spreadsheet, and click on Tools > Script Gallery. Search for “Employee of the Week Award” and you will be able to locate the script.
// Global variables
docTemplate = “enter document ID here”;
docName = “enter document name here”;

function sendDocument() {
// Full name and email address values come from the spreadsheet form
   var full_name = from-spreadsheet-form
   var email_address = from-spreadsheet-form
// Get document template, copy it as a new temp doc, and save the Doc’s id
   var copyId   = DocsList.getFileById(docTemplate)
                  .makeCopy(docName+ for +full_name)
                  .getId();
   var copyDoc  = DocumentApp.openById(copyId);
   var copyBody = copyDoc.getActiveSection();
// Replace place holder keys,
   copyBody.replaceText(keyFullName, full_name);
   var todaysDate =  Utilities.formatDate(new Date(), "GMT", "MM/dd/yyyy");
   copyBody.replaceText(keyTodaysDate, todaysDate);
// Save and close the temporary document
   copyDoc.saveAndClose();
// Convert temporary document to PDF by using the getAs blob conversion
   var pdf = DocsList.getFileById(copyId).getAs("application/pdf");
// Attach PDF and send the email
   MailApp.sendEmail(email_address, subject, body, {htmlBody: body, attachments: pdf});
// Delete temp file
   DocsList.getFileById(copyId).setTrashed(true);
}
4. Mail Merge using Sites and Spreadsheet Services
For the last example let’s assume you have a great Google Site where you create new letters for your followers. However, you have had some feedback suggest that while many users don’t mind visiting your site, some would prefer to have the newsletter emailed to them. Normally this would require copying and pasting into an email or doc. Why not simply automate this with Google Apps Script?
The body section of a site, the part you edit, can be captured as HTML by the Sites Service and placed in the body of an email. Because the return value is HTML, the pictures and text formatting come through in the email.
Here is a simple example for you to try out:
function emailSiteBody() {
 var site = SitesApp.getPageByUrl(YourPageURL);
 var body = site.getHtmlContent();

 MailApp.sendEmail(you@example.com, Site Template, no html :( , {htmlBody: body});
}
It really is that simple. Add a for loop with email values from a spreadsheet and this project is done.
Happy merging!
Updated 10/28: fixed instructions for accessing the complete script source for solution 3.
 | James Ferreira profile Author, Scripter, and developer of free apps for non-profits and schools, James has written software to help more than half a million people by extending Google Apps. |
 | Steve Webster profile Google Sites and Scripts expert from Dito specializing in training and application development. When not busy finding solutions to enhance customer capability in Google Apps, Steve shares examples of his work in the Google Apps Developer Blog. |
 | Romain Vialard profile | YouTube Google Apps Change Management consultant at Revevol, Romain writes scripts to automate everyday tasks, add functionality and facilitate rapid adoption of cutting edge web infrastructures. |

How to integrate with Google Apps and get listed on Google Apps Marketplace
If you already have a great web app or even just an idea for one and would like to learn more about integration with Google Apps, join us for a webinar next Wednesday. Well review the Marketplace and Google Apps APIs and answer technical and policy questions from attendees.
Integrate with Google Apps and the Google Apps Marketplace
Wednesday, March 17, 2010
9:00 a.m. PDT
This webinar will include a question and answer session. Post and vote for questions ahead of time and register for the webinar here. We hope youll join us for this informative online event.
UPDATE @ 5:30pm PST: Weve corrected the registration link.
Friday, February 27, 2015
Introduction to Critical Thinking 100 000 Views on SlideShare!

However, I am happy and grateful that this presentation and other things shared using a variety of tools over the last few years have benefited many teachers and students out there in one way or the other. Interestingly, over the last four years, I have gotten e-mails from some top experts/lecturers/teachers in critical thinking, and have even been invited to contribute to a book on critical thinking...Seriously!
Anyway, here is the infamous presentation again (if you missed it!):
Thursday, February 26, 2015
Mediasite com Linking you to a World of Expertise
 Link to Mediasite
MEDIASITE?
Mediasite is a tool (by Sonic Foundry) for recording and storing rich-media classroom and conference presentations ...more
MEDIASITE.COM?
Mediasite.com (beta) is a rich media search engine that automatically indexes publicly-available webcasts recorded with Mediasite. It provides you with a directory of presentations created by hundreds of experts around the globe. It is about connecting smart people with people who want to get smarter (and of course promoting Mediasite technology! Why not?). JUICE?
Actually, I am not too impressed with the technology behind Mediasite (please forgive me for my limited expertise!), including the compression and streaming technology, interface design, and simplicity. Perhaps, they could learn a few tricks about interface design from Articulate. Hmm, I suppose I will increasingly appreciate this technology as I experience and learn more about it :)
However, I really like the Mediasite.com repository, which automatically indexes publicly-available (Free!) webcasts recorded with Mediasite. In other words, if you are looking for free presentations developed using Mediasite, this is the best place to find (or search for it!). Currently, there are more than 12,200 publicly-available presentations (or 9,138 hours of audio) to engage with and learn from. These numbers will surely grow! Mark my words! However, if you dont have broadband, you are probably going to struggle to enjoy the wealth of knowledge, expertise and wisdom that is hidden in this treasure (and experience buffering galore!).
For the fun of it, here are a few potential gems I managed to discover after one search (Learning) :
- Albert Einstein: The Man Behind the Genius – for ages 12 and up
- New Strategies for E-learning Design: Harnessing Technology for Flexibility and Engagement
- From Database to Teaching Commons: Extending Learning Object Repositories
- TLC Presentation - Teaching Philosophy
- DIIA-NFS - Best Teaching Practices for Technology Enhanced Learning
- TCEA 2005 Conference Session: Introduction to Interactive Thinking Tools
In general, I really like Mediasite.coms rich media search engine (technology!), which even allows you the search within the presentation, identifying those slides that include your search inquiry. It will also display thumbnail screenshots of these slides, and you can simply click on them, and then you will be directed to that section of the presentation. Excellent! It saves us time to locate the juice, when necessary!
Finally, I am predicting that in the near future (Say 2008!), we will be able to experience a user-friendly rich media search engine that automatically indexes publicly-available webcasts, and does not discriminate between the rich media solutions or technologies (includes Mediasite, Articulate, and Breeze presentations, etc.). Does such a search engine already exist?
Every problem contains an opportunity :)
Wednesday, February 25, 2015
How to Make Your Fonts Look Fancy in PowerPoint

This was a definite winner on the poll!

For those of you who saw my previous tutorial on placing a pattern over your text, you can add these options on top of the pattern to make your font extra special! You can view that previous tutorial below:

Now... onto the tutorial!


You can download this tutorial as a PDF by clicking this picture!

As for next weeks poll, Im going to add a question that so many people often ask... how can I find "royalty-free" clipart, pictures, and textures for free? Be sure to vote for your favorite choice on the poll!
Back to School with No David!

I included 10 different writing options... perfect for all of the elementary grades:
- David’s Body – without any text
- David’s Body – with Name/Date on arms and room for an illustration
- David’s Body – with large primary writing lines and room for a picture
- David’s Body – with medium primary writing lines and room for a picture
- David’s Body – with small primary writing lines and room for a picture
- David’s Body – with writing lines and room for a picture
- David’s Body – with large primary writing lines, no room for a picture
- David’s Body – with medium primary writing lines, no room for a picture
- David’s Body – with small primary writing lines, no room for a picture
- David’s Body – with writing lines, no room for a picture
There are also additional writing pages available for each of the levels so that your students can attach multiple pages on their puppet!
It also has two options in terms of the thickness of lines... As far as the line thickness, I like to use thicker lines with my Kindergarten students so that they can color in the lines easier, and in the past I’ve used thinner lines with older students so that they don’t assume you’re giving them a “baby” coloring page!
Check it out at TPT by clicking the picture above! Its $4, but theres a big sale coming up at TPT, so you can get it at a discount very soon! Click the picture below to see my store!

From Andragogy to Heutagogy
Link to article (By Stewart Hase and Chris Kenyon)
"...This paper suggests there is benefit in moving from andragogy towards truly self-determined learning. The concept of truly self-determined learning, called heutagogy, builds on humanistic theory and approaches to learning described in the 1950s. It is suggested that heutagogy is appropriate to the needs of learners in the twenty-first century, particularly in the development of individual capability. A number of implications of heutagogy for higher education and vocational education are discussed."
"A heutagogical approach recognises the need to be flexible in the learning where the teacher provides resources but the learner designs the actual course he or she might take by negotiating the learning. Thus learners might read around critical issues or questions and determine what is of interest and relevance to them and then negotiate further reading and assessment tasks. With respect to the latter, assessment becomes more of a learning experience rather than a means to measure attainment. As teachers we should concern ourselves with developing the learner?s capability not just embedding discipline based skills and knowledge. We should relinquish any power we deem ourselves to have."
Heutagogy promotes a self-determined learning approach beyond the reality of most of todays Universities. It will surely empower learners increasingly in determining their future education! Though, are learners ready to take this role of responsibility of designing their own courses (or program)? Also, are Universities or the current generation of teachers and lecturers prepared for such a revolution on par with Andragogy? It will be interesting to see how heutagogy or similar theories will affect the learning process both in the higher learning and corporate sectors in the coming years.
In the meantime lets learn more about Heutagogy.
Wednesday, February 18, 2015
5 Facile Yet Incredibly Valuable Ways to Enhance ASP NET Developer’s Efficiency

Make Handling the Requests an Asynchronous Exercise
Use the Browser’s Tools and Extensions
Pool the connections to Free up Some Resources
Do not Keep Debuggers Running at All Times
Make the Most of Cache Class
Tuesday, February 17, 2015
ACOOLSOFT PPT TO VIDEO PRO 3 2 8 5 WITH SERIAL KEY

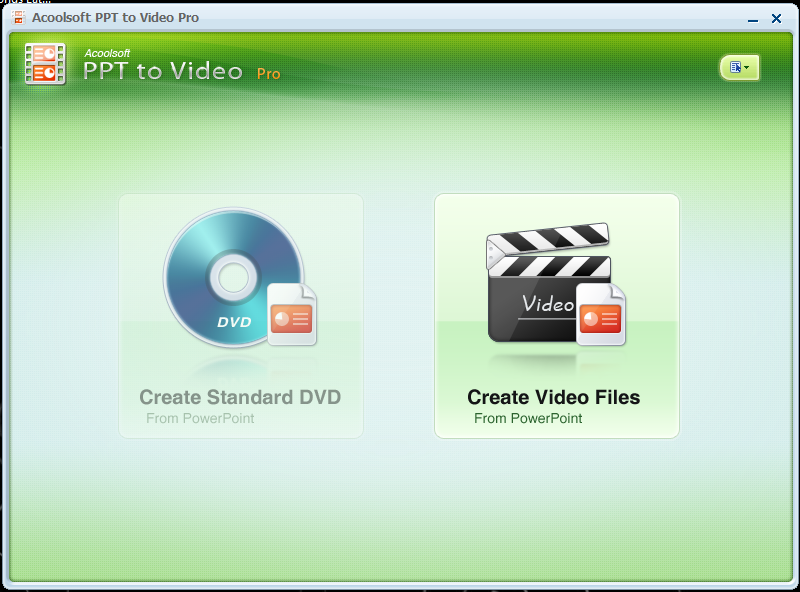
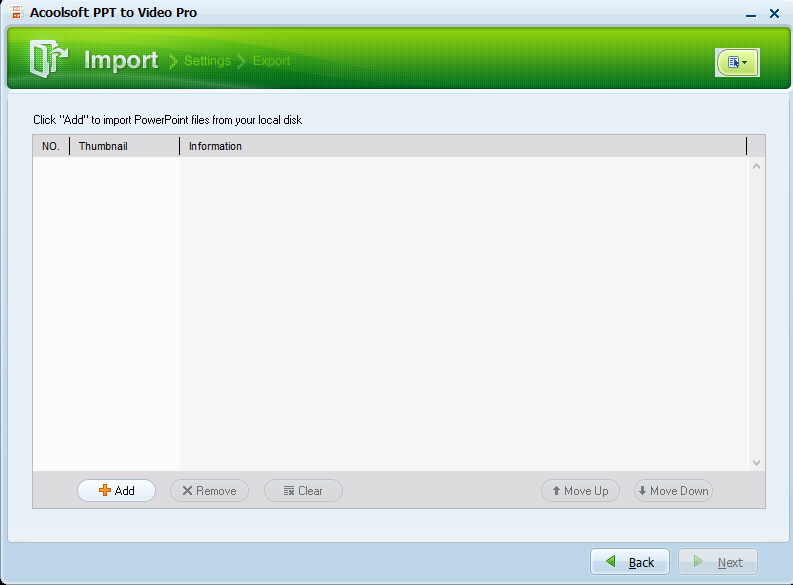
Acoolsoft PPT to Video Pro is a professional PowerPoint to video converter which empowers you to easily convert PowerPoint to video in popular formats such as MPEG, AVI, MP4, WMV, 3GP, FLV and MOV. With only a few mouse clicks, you can convert your PowerPoint presentations to dynamic video with all transitions, animations, sounds, and movie clips retained.
System requirements:
Windows XP/2003/Vista/7 and 8
Screen Shots: Click on the image to vow large screen
 |  |  |
Sunday, February 15, 2015
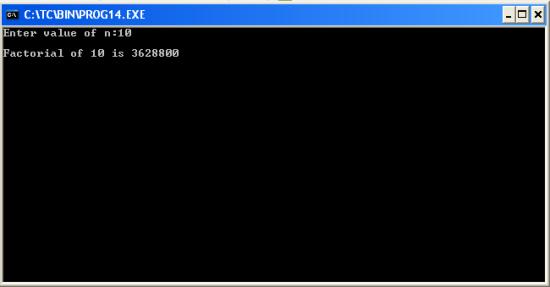
C program to calculate the factorial of an integer
#include<stdio.h>
#include<conio.h>
void main()
{
long i,n,fac=1;
clrscr(); //to clear the screen
printf("Enter value of n:");
scanf("%ld",&n);
for(i=n;i>=1;--i)
fac*=i;
printf("
Factorial of %ld is %ld",n,fac);
getch(); //to stop the screen
}
Thursday, February 12, 2015
How To Send Free MMS In Pakistan
 |
| How To Send Free MMS In Pakistan |
Ab Ap Sab MMS send karen Pooray Pakistan Me Woh B Bilkul Free :)
Assalam O Alaikum Dosto Umeed hy ap sab khairyat se hongay aj main apke saqth ik aisi web aur usay use karne ka method show kar raha hun jis se ap pooray Pakisan aur is k ilawa sari dunya me bilkul free sms and MMS send kar saktay hain
.png "How To Send Free MMS In Pakistan") |
| How To Send Free MMS In Pakistan |
yeh raha us website ka screenshot jaisa k is me dikhaya gaya hy is me first row k andar recipent ka number 2nd me provider aur 3rd me apka msg editor hy jis me ap apna mms compose kar saktay hain aur phr last me apna mms submit kar den. agar pasand aye to dosto k sath zaroor sahre karen aur mujhy duaon me yad rakhya ga :)
Tuesday, February 10, 2015
HowTo Install ImageMagick 6 8 7 Q16 64bit to ActivePerl 5 16 3 in Windows 7

Step 2: a User Account Control window will pop-up, click YES
Step 3: press next

Step 4: select the "I accept the agreement"

Step 5: press next

Step 6: press next

Step 7: press next

Step 8: put a check on the "Install PerlMagick for ActiveState Perl v 5.16.3, then press next

Step 9: press install

Step 10: wait for installation

Step 11: this command prompt will pop-up, DO NOT CLOSE it, it will close by itself!!

Step 12: if you see this window, click next

Step 13: uncheck the "view index.html", then press Finish!!

Installation is now complete, you can now add the Image::Magick module by adding the line below to your perl script!
use Image::Magick;
C program to check whether a number is prime or not

#include<stdio.h>
#include<conio.h>
void main()
{
int n,i,flag=1;
clrscr(); //to clear the screen
printf("Enter any number:");
scanf("%d",&n);
for(i=2;i<n/2;++i)
if(n%i==0)
{
flag=0;
break;
}
if(flag==1)
printf("
The given number is prime");
else
printf("
The given number is not prime");
getch(); //to stop the screen
}
Saturday, January 31, 2015
How to Create Wi Fi Hotspot for All Windows in Urdu


Friday, January 30, 2015
O 8 52 stock rom to unbrick your phone

Firmware Here -->O+ 8.52
Alternative Driver --> AutoInstaller
"Extract the files to your desired folder" See picture below"
"If you encounter error in flashtool, use different version of it."

Installing Driver
First try the Alternative Driver, which is the AutoInstaller. Just open the install.bat then it will automatically install the driver. Then proceed to flashing. If it did not work then proceed with VCOM driver that you had downloaded. Then install it manually follow the guide below.
Video Reference using Driver Auto Installer (watch in HD)
When installing it manually your phone must be turned off, then connect it to your computer/laptop while pressing VOLUME UP or VOLUME DOWN. This will detect and look for the driver.

1. This is the first time that you will connect your phone and it will search for the correct driver.


3. If the driver is successfully installed MediaTek DA USB VCOM will appear in the New Hardware Wizard.
Video Flashing your phone (please watch in HD)
Flashing


Video Reference Using FlashTool version 5.xxx (watch in HD)
3. After you load the file, press F9 or Press Download to Flash your Phone.
"Hard reset your phone after flashing"
I hope this tutorial help you. Please drop a comment if something is not clear to you.
Saturday, January 24, 2015
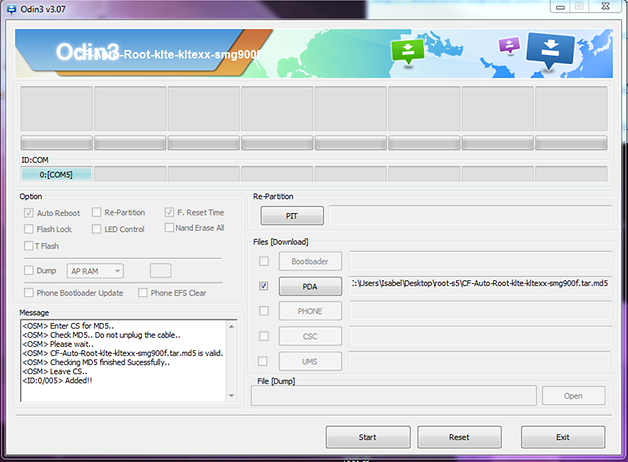
How to Root Samsung Galaxy S5
How to Root Samsung Galaxy S5
Tutorial
 |
| Samsung Galaxy S5 |

 |
| Odin |